
ABOUT US
OVERVIEW
We are a leading provider of innovative construction and decorative solutions, formed through the merger of Maxi Propel Sdn Bhd and EPS Foam Deco Sdn Bhd. Together, we bring a wealth of expertise and a comprehensive product and service offering to meet the diverse needs of our clients across commercial, residential, and government sectors.
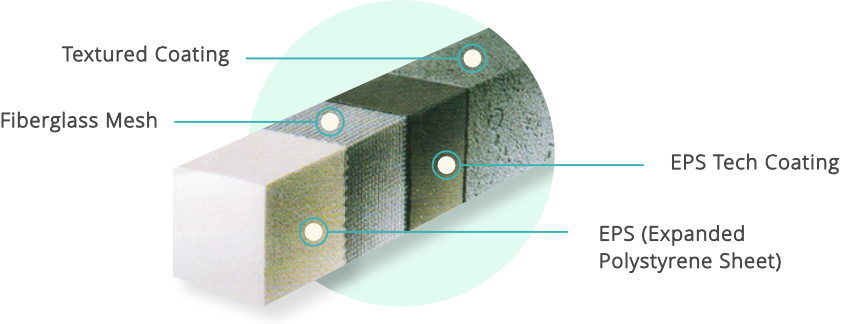
Our product range includes a full suite of polystyrene-concrete decorative elements such as cornices, dentils, motifs, hoods, sills, copings, keystones, arches, and corbels. Each product is crafted with precision, featuring polystyrene foam cores reinforced with fiberglass mesh and coated with durable cement finishes — ensuring both aesthetic appeal and long-lasting performance for interior and exterior applications.
Beyond manufacturing, we specialize in construction-based services with a strong focus on lightweight coping supply and installation. Our team, comprising around 30 dedicated employees and a trusted network of subcontractors, is committed to delivering superior, pragmatic solutions that support the successful management and execution of projects from start to finish.
By combining technical excellence, a customer-centric approach, and a dedication to quality, we are well-positioned to serve as a trusted partner in bringing creative visions to life and enhancing the built environment.
VISION
To be leader in the decorative industry.
MISSION
Quality assurance, timely delivery, cost effective and customer satisfaction.
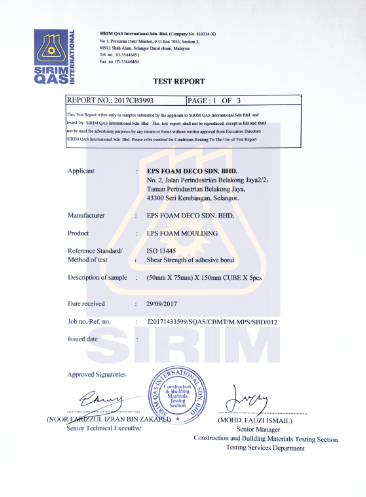
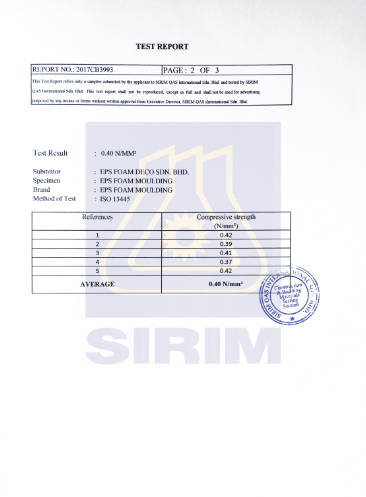
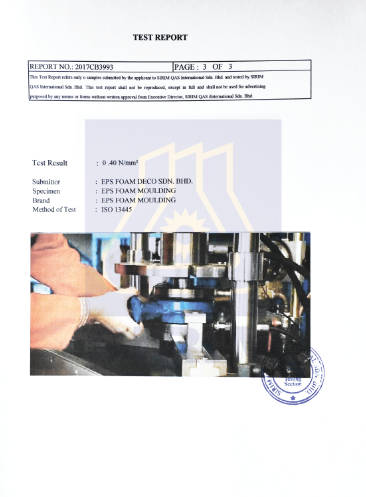
CERTIFICATES
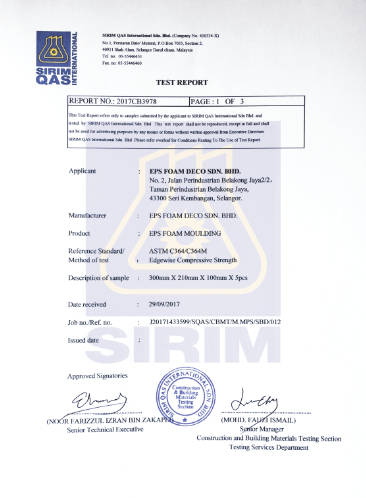
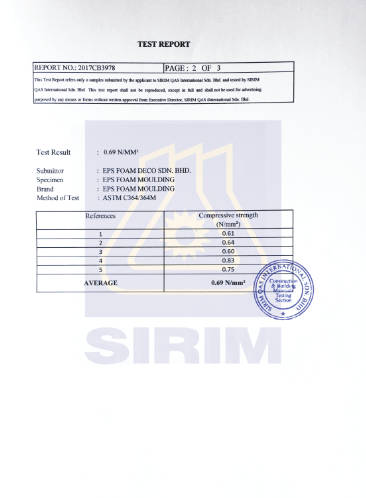
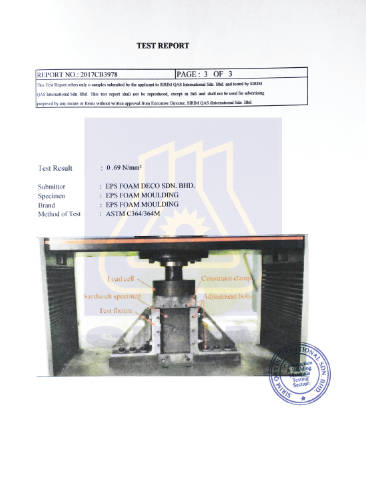
EDGEWISE COMPRESSIVE STRENGTH TEST
SHEER STRENGTH OF ADHESIVE BOND TEST
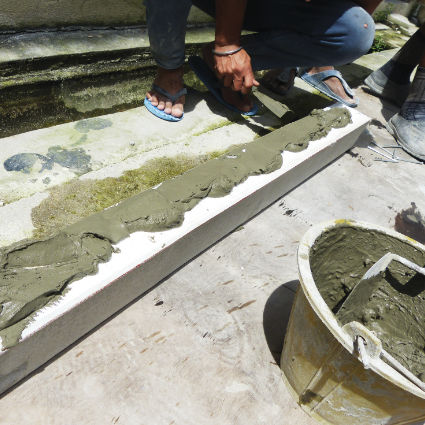
INSTALLATION METHODS
JOINING METHODS

STEP 1
Stir the mixture of EPS bond with some water until it achieves the desired consistency.
STEP 2
Apply EPS bond to the bonding surface of EPS cornicle.
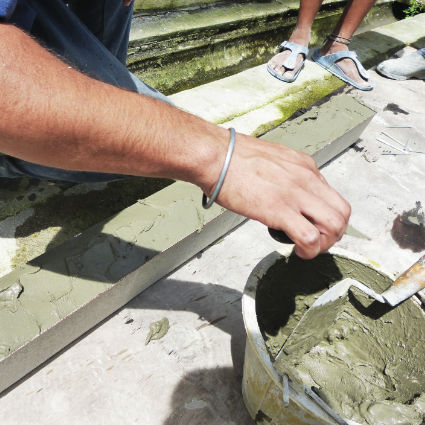
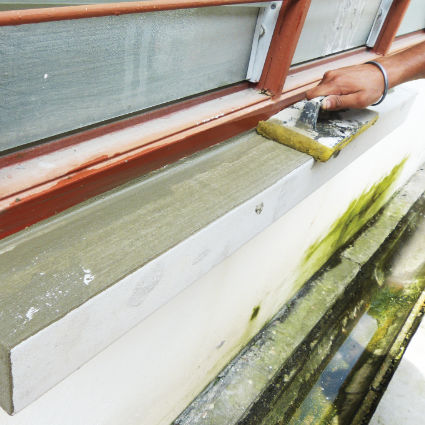
STEP 3
Apply the mixture to bonding surface up to average thickness of 4mm to 6mm. A wall surface which is even need thinner mixture than crooked surface wall.
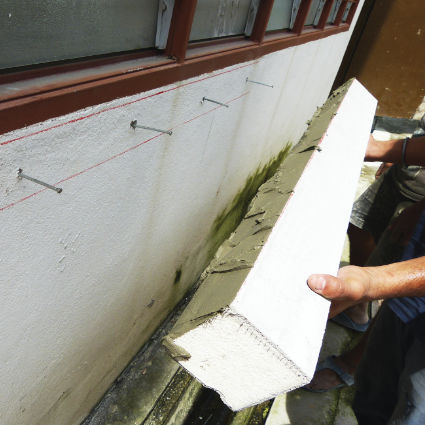
STEP 4
Push the EPS cornice towards the nails and targeted location with the bonding surface which is already applied with EPS bond.
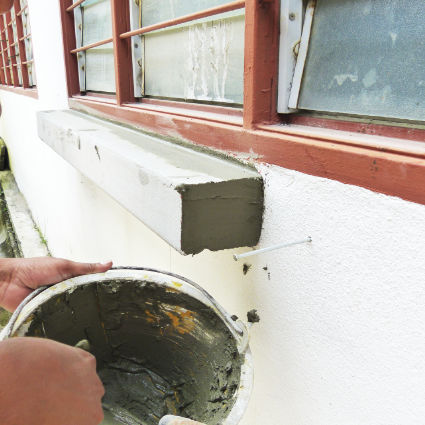
STEP 5
Push EPS cornice strongly towards the wall. Knock along the surface of EPS cornice by using hand.
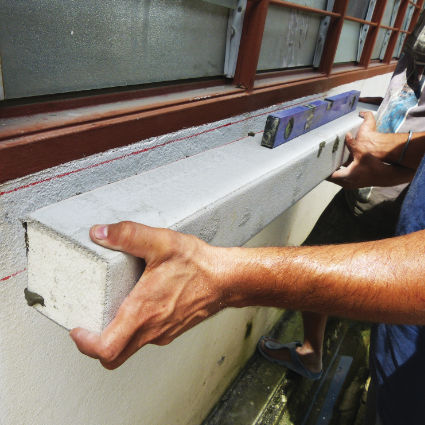
STEP 6
Use EPS bond to infill and seal up all the gap between EPS cornice and wall.

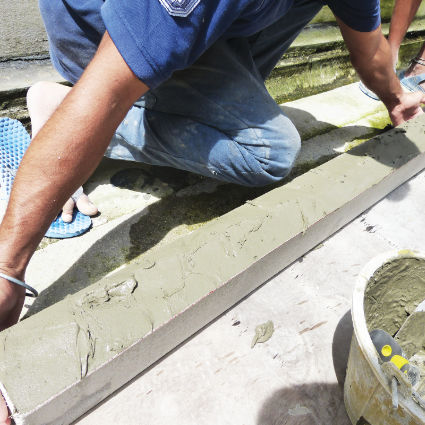
STEP 7
Cover both ends with EPS bond mixture by scrapper, apply strength while using scrapper. The thickness of the mixture for the ends should be approximately 4mm.
STEP 8
If necessary, trim the mixture infill by using sponge trowel or brush.
STEP 9
Cover the joining part with EPS bond mixture by using scrapper.
STEP 10
Repeat step 2 & 3 and cover the joining end with EPS bond & mixture to a thickness of about 4mm.
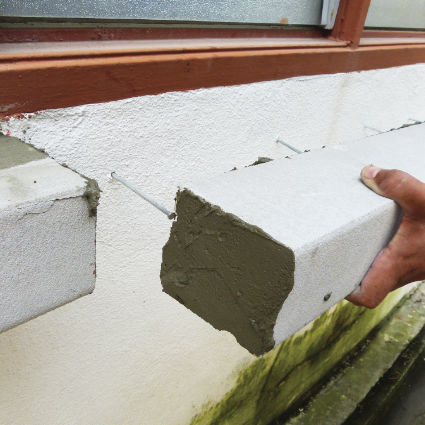
STEP 11
Push EPS cornice to the wall to join the other piece of EPS cornice.
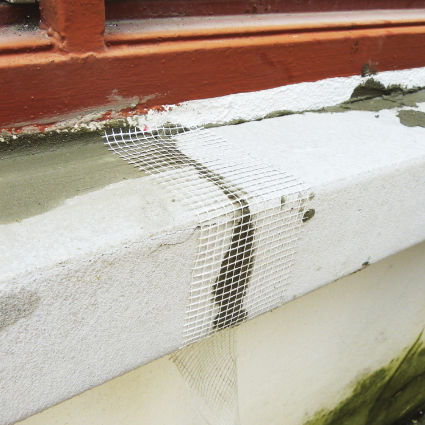
STEP 12
Apply fiberglass mesh stick on the join part.
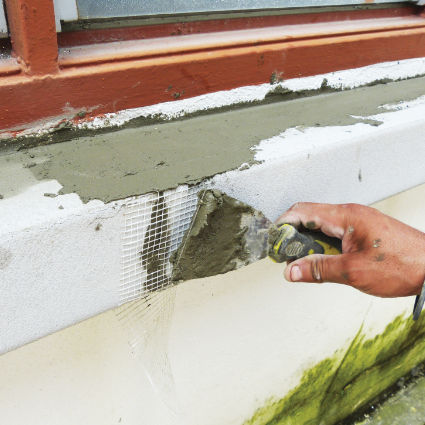
STEP 13
Cover up the fiberglass mesh by applying EPS bond and infill all the gap. Trim all the mixture infill on the gap by using sponge towel or brush.
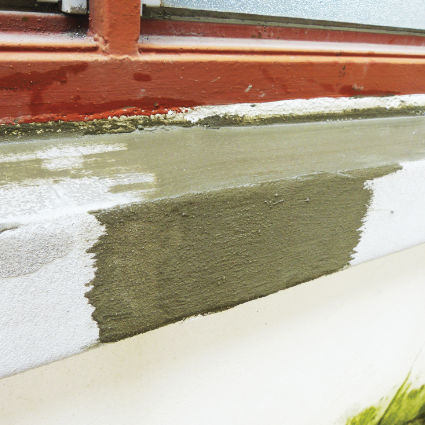
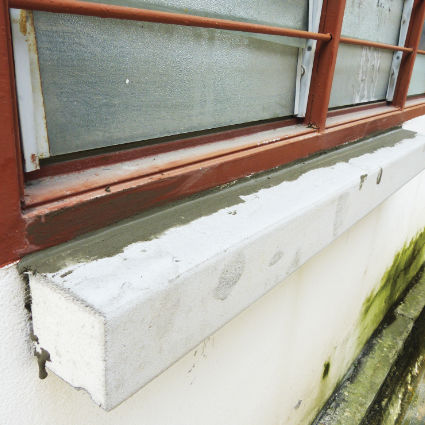
STEP 14
The picture shows the joint after trimming.